 Hetarena.com
There are many samples of Visual Studio 2013 which work with Windows Asure Active Directory (WAAD) authentication. But I can’t find any examples going with AD FS 2.0. That’s why I wrote this entry. I’ll introduce a way to build a web application in Visual Studio 2013 working with AD FS 2.0 step by step.
Making a Visual Studio 2013 Program
First, we will make a web program using authentication by ADFS.
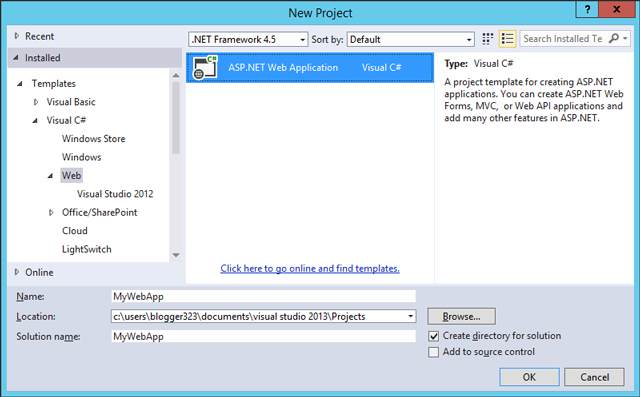
Select ‘File’ – ‘New’ – ‘Project’.
Select a template, ‘Installed’ – ‘Templates’ – ‘Visual C#’ – ‘Web’ – ‘ASP.NET Web Application’.
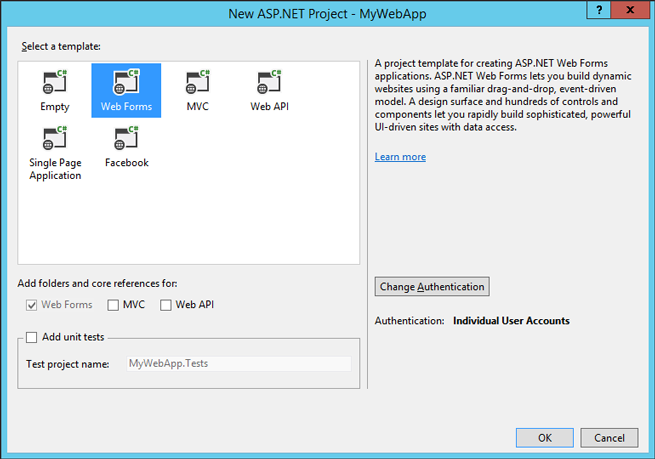
Click ‘Change Authentication’.
In the ‘Change Authentication’ dialog, input as follows.
- Select ‘Organizational Accounts’
- Select ‘On-Premises’
- Input your Federation Metadata URL which you can find in the ADFS management tool. (ex. ‘https://fs.example.com/FederationMetadata/2007-06/FederationMetadata.xml’)
- Input your Application URI. In this example, we use ‘https://iis.example.com/mywebapp’.
Click ‘OK’ twice.
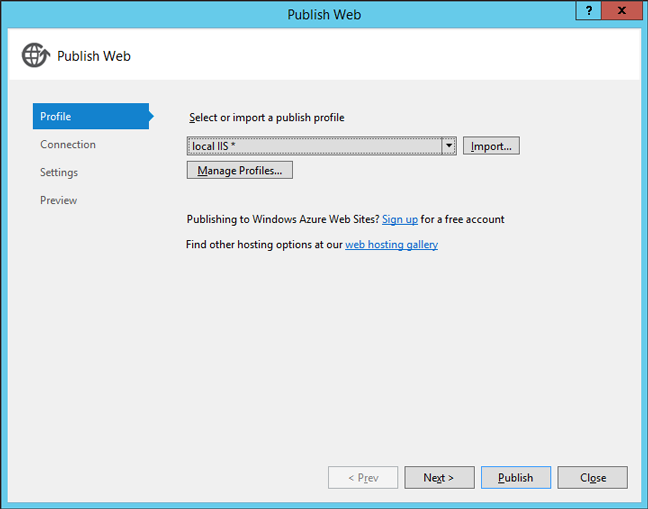
Next step is to build and publish the program to IIS. You need to run Visual Studio as administrator. This example assumes that IIS is running on localhost.
Select your project and then select ‘Build’ – ‘Publish MyWebApp’
Name your profile.
Enter your IIS information. In this example, we publish the program to ‘Default Web Site/mywebapp’. If you failed to validate connection, make sure that ‘Web Management Service’ is running and you run Visual Studio as administrator.
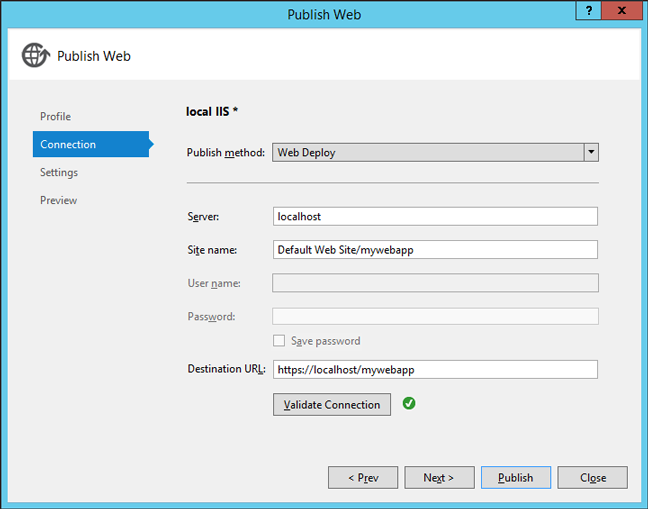
Skip Setttings and Preview pages and press ‘Publish’.
After publication, ignoring certification warnings, you will be redirected to the ADFS in your web blowser. And then authentication will fail. We still need to setup the AD FS side.
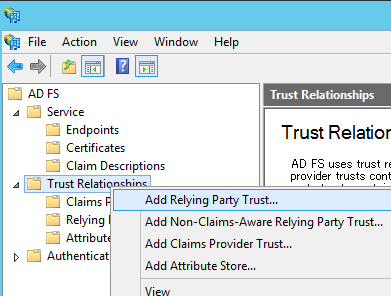
Setup Active Directory Federation Services 2.0
We will configure AD FS.
Choose ‘Add Relying Party Trust’ in the ‘AD FS Management’ tool. And click ‘Start’ in the wizard.
Select ‘Enter data about the relying party manually’.

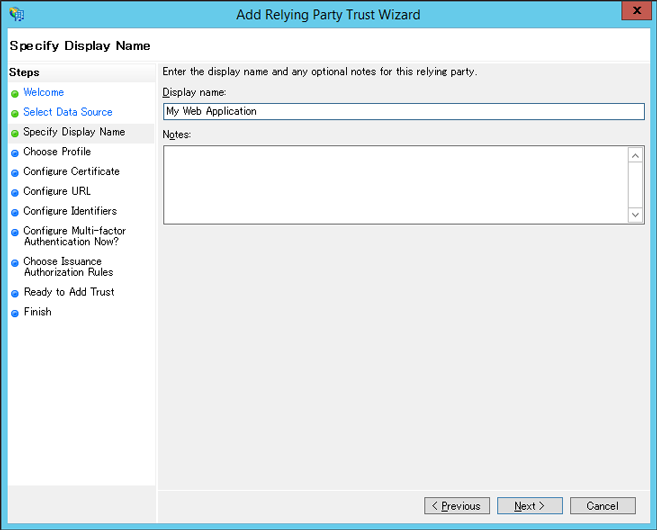
Enter ‘Display Name’ to distinguish entries.
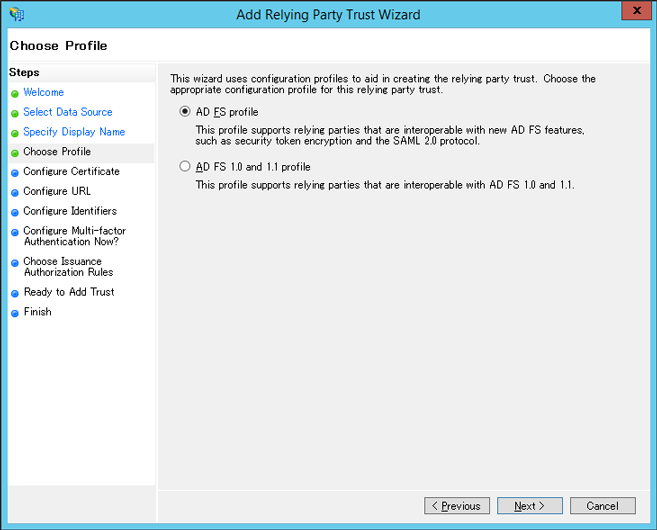
Choose ‘AD FS profile’
Skip the ‘Configure Certificate’ page.
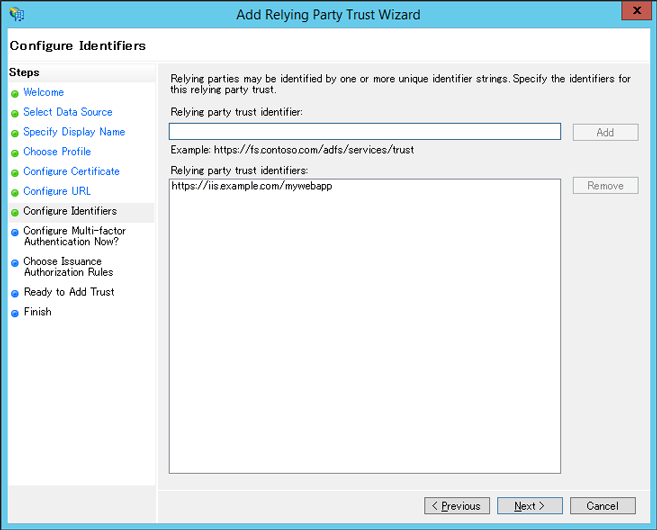
Select ‘Enable support for the WS-Federation Passive protocol’, and enter your application-URL (https://iis.example.com/mywebapp) in the ‘Configure URL’ page.

Make sure that your application URL is listed as ‘Relying party trust identifier’ and click Next.
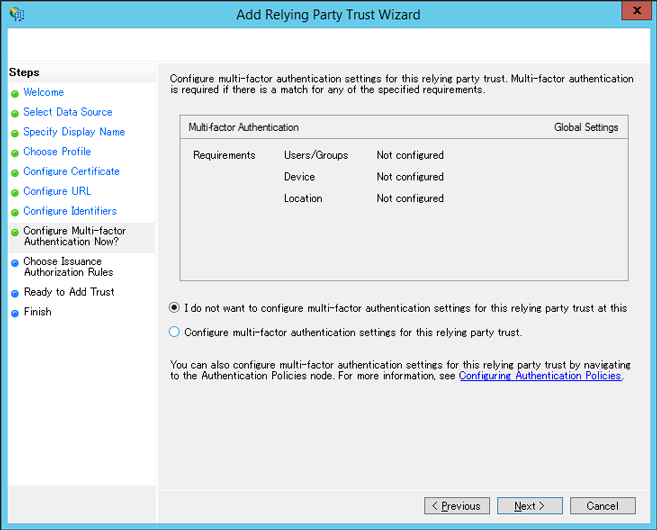
Select ‘I do not want to configure multi-factor authentication settings for this relying party trust at this’
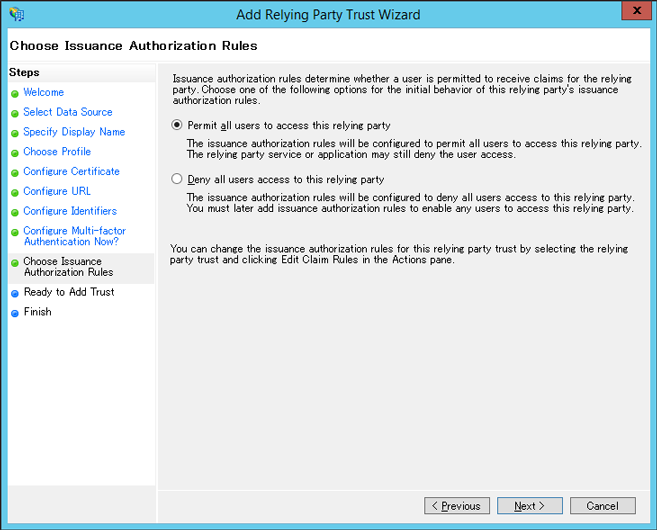
Select ‘Permit all users to access this relying party’.
Click Next in the ‘Ready to Add Trust’ page and Close the Finish page.
After all, your application is ready to work with AD FS. Access your application URL (https://iis.example.com/mywebapp/). Don’t forget last slash in your URL. After authenticated by AD FS, you will see the ASP.NET template page.
Because this is a sample scenario, detailed settings, such as certification configuration, are skipped. You will need to modify configuration to deploy the program in production environment.